以Python3做為開發Line Bot 的操作環境。
步驟1:在repl.it 選擇Python3建立「test」開發專案。
步驟2:輸入程式碼
from flask import Flask, request, abort

from linebot import (
    LineBotApi, WebhookHandler
)

from linebot.exceptions import (
    InvalidSignatureError
)

from linebot.models import (
    MessageEvent, TextMessage, TextSendMessage,
)

import os
app = Flask(__name__)

token = os.environ.get("CHANNEL_ACCESS_TOKEN")
secret= os.environ.get("CHANNEL_SECRET")
line_bot_api = LineBotApi(token)
handler = WebhookHandler(secret)

@app.route('/callback', methods=['POST'])
def callback():
    signature = request.headers['X-Line-Signature']
    body = request.get_data(as_text=True)
    app.logger.info("Request body: " + body)

    try:
        handler.handle(body, signature)
    except InvalidSignatureError:
        print("Invalid signature. Please check your channel access token/channel secret.")
        abort(400)

    return 'OK'

app.run(host='0.0.0.0', port=8080)
步驟3:登入 LINE Developers 後台建立Line Bot帳號。
(1) 點擊 「Create a new channel」。
(2) 點擊「Message API」。
(3) 輸入必要資訊。
(4) 勾選與建立帳號。
(5) 點擊「同意」。
步驟5:取得「Channel access token」。
(1) 切換頁籤至「Message API」。
(2) 點擊「issue」產生Token。
(3) 將Token複製存好。
步驟6:取得「Channel secret」。
(1) 切換頁籤至「Basic settings」。
(2) 複製存好「Channel secret」。
步驟7:在repl.it 的「test」開發專案下新增「.env」檔案,輸入剛剛保存的「Channel access token」跟「Channel secret」。
CHANNEL_ACCESS_TOKEN=「Channel access token」
CHANNEL_SECRET=「Channel secret」
步驟8:執行「test」開發專案,並取得URL。
步驟9:回到 LINE Developers 後台,切換至「Message API」頁籤測試「Webhook URL」。
(1) 點擊「Edit」按鈕。
(2) 輸入剛剛取得URL,並在URL後加上「/callback」,點擊「Update」按鈕。
(3) 點擊「Verify」按鈕,確認連結成功。
(4) 掃描QR code加入Line Bot帳號到Line中,並啟動與Line的連結
步驟10:加入回應的程式碼到「test」開發專案,並重新啟動專案執行。
@handler.add(MessageEvent, message=TextMessage)
def handle_message(event):
    line_bot_api.reply_message(
        event.reply_token,
        TextSendMessage(text=event.message.text))
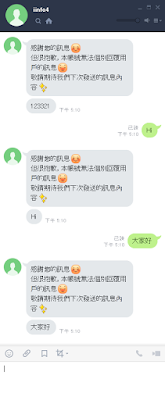
步驟11:在Line Bot輸入任意字,看結果。
步驟12:若不想見到期他由系統回的訊息,到回到 LINE Developers 後台,切換至「Message API」頁籤,關閉自動回應。
(1) 在「Auto-reply messages」後面,點擊「Edit」。
(3) 在「自動回應訊息」的設定中,點擊「停用」。
步驟13:回頭再測試最後結果。
到這裡已經完成所有的Line Bot的基本設定了。
幾個地方需注意:
1.步驟7的「Channel access token」跟「Channel secret」一定要先設定,如此步驟9才能順利驗證成功。
2. 步驟9的「Webhook URL」需要從步驟7中取得,在repl.it 的專案執行後才能產生URL。
3.步驟10的程式碼,需等步驟9完成驗後,再輸入置專案,不然執行驗證URL將無法驗證成功。
4.在步驟9的URL,「/callback」與步驟2程式碼中第23行相關。


沒有留言:
張貼留言